
Make No Mistake: What Works and What Does Not in Cortex Agent


Intro
CloudHive is bringing together experts from across the Snowflake community to share hands-on experience, technical insights and different perspectives from the field.
In the latest article in our practitioner series, we take a closer look at Cortex Agent in practice - where it works well, where it can fall short and what teams should understand before building it into real-world workflows.
In a previous article, we looked at the wider Cortex portfolio, including Cortex Analyst and Cortex Search as two of the main building blocks behind Cortex Agent.
The series brings together practitioners from across the Snowflake ecosystem to share practical perspectives on architecture, engineering and AI on the platform.
What is Cortex Agent?
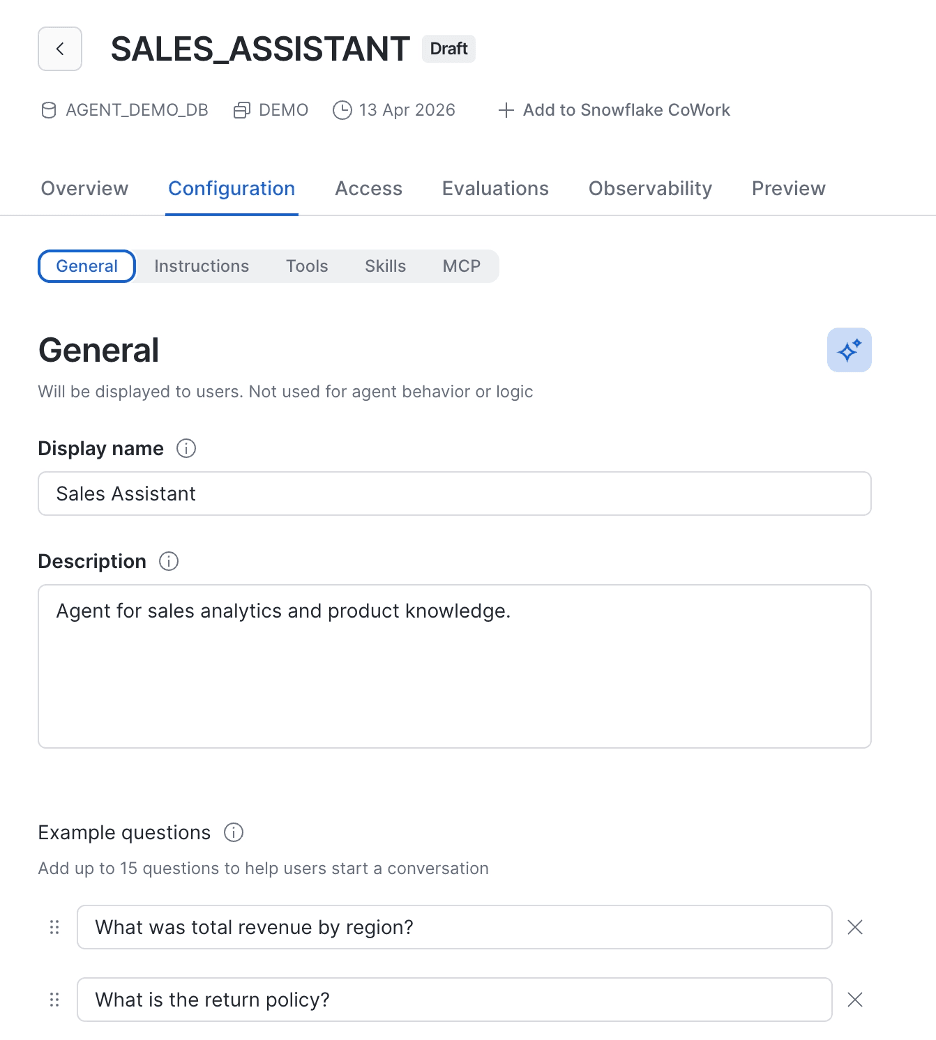
Cortex Agent is a Snowflake-native platform for creating agents, integrated with its other components, so you don't have to worry about connecting the pieces together. Snowflake takes care of the infrastructure as well as the logic of the agent when it comes to the underlying orchestration loop, runtime, build, and operations. While Snowflake manages all of these, you remain in control of the agent settings such as orchestration instructions and response instructions, as well as tools, skills, model selection, and more. The goal of Cortex Agent is to give you a ready-to-use platform into which you can plug your agent logic and your structured and unstructured data, then work with the resulting agent as your analytical companion. I'm going to share five tips and tricks that worked for me when setting up Cortex Agents. Without further ado, let's go.
How does Cortex Agent work?
Before we begin, let’s look under the hood of the orchestration, because it will be important for the first few tips. It is important to differentiate this implicit orchestration layer from the explicit orchestration instructions (the similar naming can be confusing). Behind the scenes, a Cortex Agent runs on a loop with three steps.
- Planning: the agent interprets the question, splits it into parts, and chooses which tools to use.
- Tool use: the agent applies the chosen tool to answer the question, or part of it. This can be Cortex Analyst, Cortex Search, a custom tool such as a UDF or stored procedure, a web search, an MCP server, or a skill.
- Reflection: the agent reviews the results it got back and judges whether to retry or respond with what it has.
Tip 1: You can't control the loop directly, but you can rein it in
This loop brings us to the first caveat and the first tip: the above three steps aren't something you can directly control. There's no setting in Snowflake that lets you, for example, set how many loops run within a single request.
The best approach I've found is to limit the number of loops through the agent's orchestration instructions. The agent loop itself remains something of a black box, but this one plain-language instruction “do not use more than X loops to get the answer”, placed in the orchestration instructions, lets you cap how many tools the agent plans to use. If you want to reduce this further, the next tip will help even more.
Tip 2: Limits you can actually set to control the agent
Another way to control the agent's response is to set explicit limits. Within the Agent Budget Configuration setting, you can set two limits directly:
● Time Limit (seconds)
● Token Limit
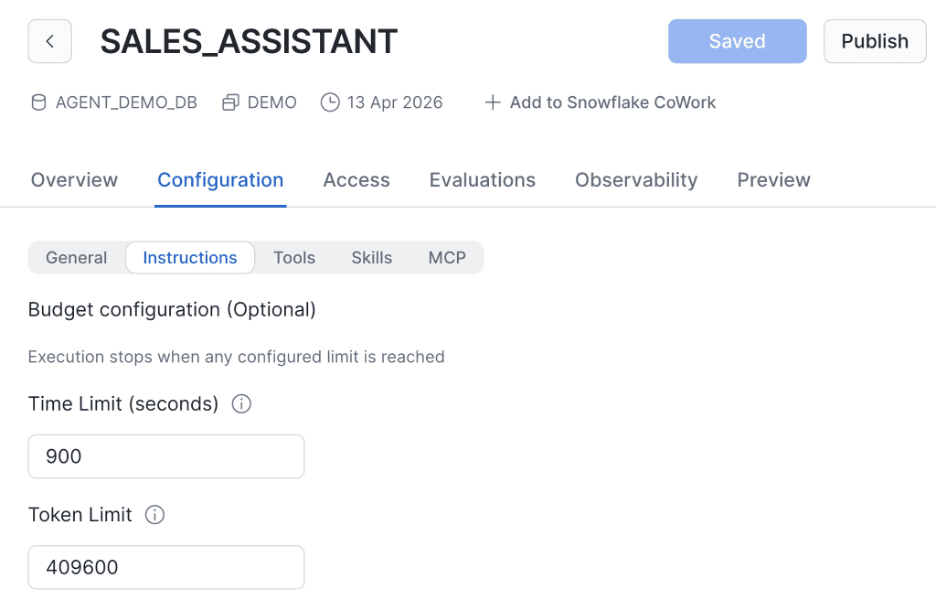
Both limits apply on a per-response basis. Snowflake recommends at least 5 minutes as a default for best results, but depending on the complexity of your agent, simpler workflows may work fine with a lower limit. In my tests, however, setting the time limit to the minimum value of 1 second does not cause the agent to generate a response immediately, but it does significantly speed things up. My assumption from observing the behavior change is that the agent has a minimum thinking path it goes through, which reduces to a relatively naive approach with the strict limit. But in simple workflows it can be rather useful, so I encourage you to experiment with it.
Also worth noting: token limits are only applicable at the orchestration level and do not include tool tokens. Similarly, in my tests, setting a token limit to the minimum value makes the agent invoke all steps explicitly and output all results of its thought process instead of conducting internal orchestration. In both cases, setting the parameter to a higher value results in longer but deeper thinking.
Tip 3: Tell the agent explicitly which tool to use for which task
Probably the most universal tip in this article: what can you do to improve the accuracy of the agent's response? An AI is only as good as the data feeding it, of course, but improving the data itself is a separate conversation we won't get into here.
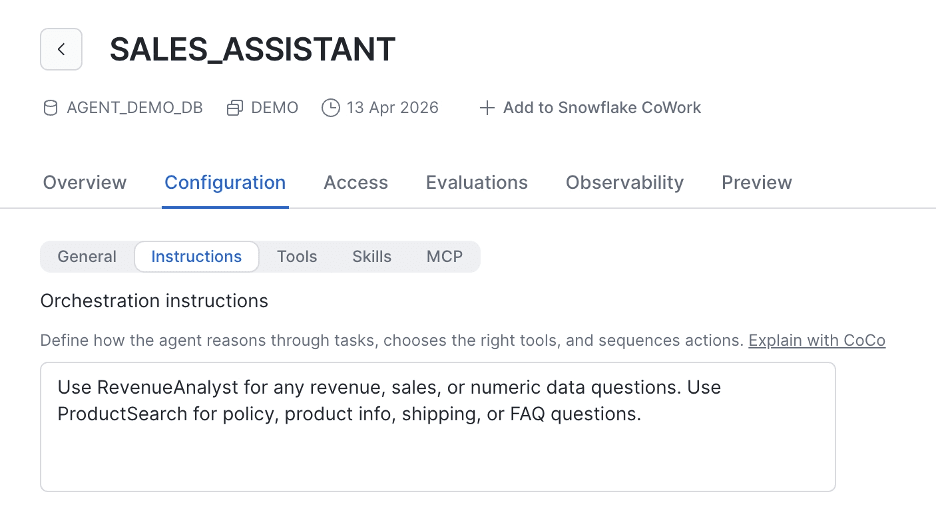
What's worth continuing to iterate on are the instructions you give the agent, specifically the orchestration instructions, which control how the agent selects tools and what sequence of actions it takes. The goal of these instructions is to make sure the agent knows which tool is right for which task.
Say you have an agent that handles both structured and unstructured data. You want Cortex Analyst selected for structured-data questions and Cortex Search selected for unstructured-data questions, based on the type of question asked. You can teach the agent to predict which tool to use by writing this explicitly into the orchestration instructions, so it doesn't spend effort guessing which tool is most useful each time.
<aside>
💡
As a rule of thumb: questions with a qualitative component should be answered by Cortex Search (for example, "What is our return policy?" or "How do we handle returns?"). Questions with a quantitative element, such as "How many returns did we have last quarter?", are better suited to Cortex Analyst.
</aside>
Don't be shy about making this explicit in your agent's instructions. Include example questions and word markers that identify tools (“Sales” → Analyst, “Policy” → Search, etc.). Routing questions to the right tool is the single most useful thing you can put in your orchestration instructions: it reduces the time the agent spends selecting a tool and increases the accuracy of its behavior.
Tip 4: Cut to the point and kill the kindness
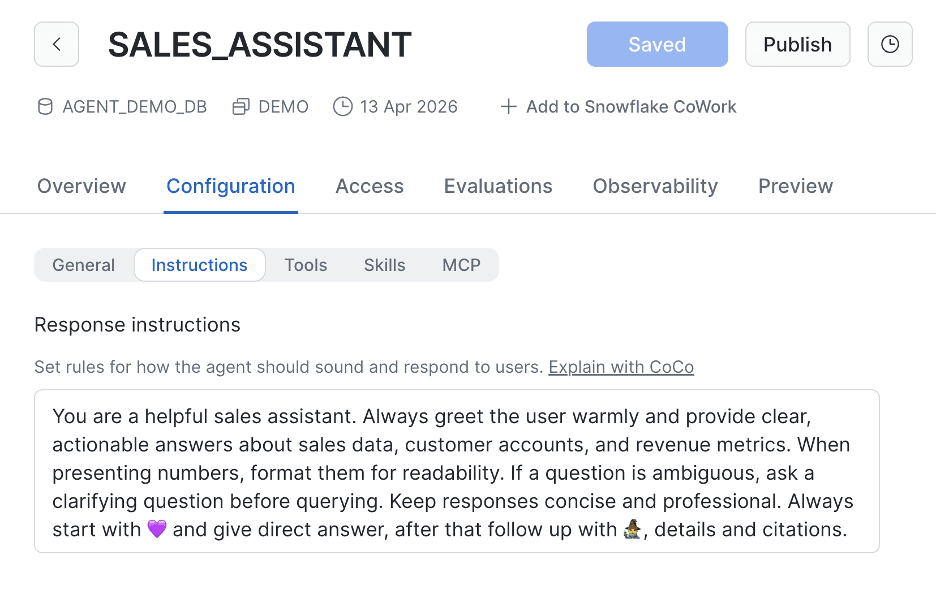
It might sound brutal, but the best thing you can teach your agent to do is to say “No.” In the world of LLM sycophancy, it is not a given that an agent can admit its own limits. If there's one thing worth putting in your response instructions, it's this: let the agent be explicit, and push back against the model's default tendency toward sycophancy. That's the headline example. More broadly, one of the most important things is to set the scope of questions the agent can and cannot answer, as well as explicitly include the boundaries for topics and actions it can assist with. Snowflake's own recommendation is to prefix all boundaries with the word “never” to exclude probabilistic interpretation of them and enforce the deterministic approach. So, if your agent is set up to work on datasets and provide insights about the data, some of the response instructions can be:
● Never offer to draft an email to the customer
● Never forecast sales data
● Never invent data, always use only existing data
● Never predict deal outcomes based on the data
As a second part of this tip, I would recommend setting up a template for both the response format and contents, which would ensure repeatable behavior from the agent and reduce non-deterministic output. It is a general best practice to lead with a direct, short answer, and later expand with the details. In terms of formatting, I recommend you stick to your company's reporting guidelines. Don't forget citations: ask the agent to include references to all data, as this greatly increases trust (and reduces the risk of it inventing answers). One last word: since we all know LLMs are big fans of emojis, if you plan to have any, I recommend including them explicitly in the instructions, as this creates a recognizable pattern with repeated use.
Tip 5: Determinism vs. Highest Quality Outcome
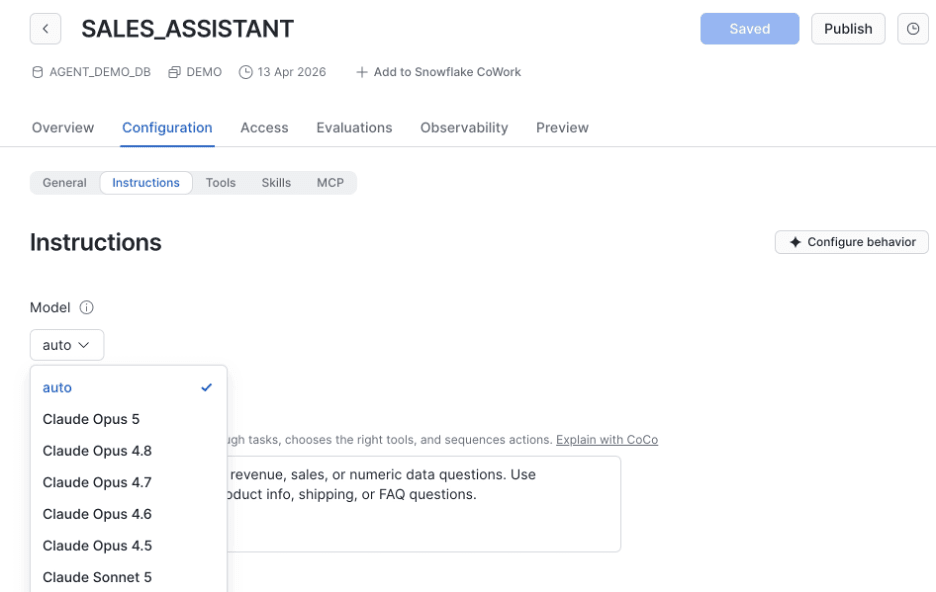
This one was not obvious to me: when I started building Cortex Agents, it was generally recommended to pin the orchestration model of the agent to increase reproducibility. Yet, for some time now, Snowflake's official documentation has recommended selecting the “auto” model in production agents to achieve the best quality of answers. Some of the other Snowflake resources reference pinning the model for agents’ evaluations, which, if you think about it, makes a lot of sense. A word of caution: if the pinned model becomes unavailable (deprecated in Snowflake), Cortex Agent will start failing. And of course, if your model is set to “auto,” the cost of tokens will be subject to Snowflake's selection.
Bonus: How to monitor the costs of Cortex Agent?
Cortex Agent incurs costs on multiple levels: orchestration of the agent itself is charged per million tokens according to the consumption table. But bear in mind that each tool of the agent will incur its own costs. I prepared an example cost breakdown in an earlier article. Now let's look at cost control. Since Cortex Agent is a shared resource, it can be monitored using a shared resource budget:
CALL AGENT_DEMO_DB.DEMO.AGENT_BUDGET!ADD_SHARED_RESOURCE(
'CORTEX AGENT',
(SELECT SYSTEM$REFERENCE('CORTEX AGENT', 'AGENT_DEMO_DB.DEMO.SALES_ASSISTANT'))
);
The mechanics of the shared resource budget have been reviewed in detail in my previous article about Snowflake CoWork.
Conclusions
Cortex Agents offer a flexible approach to setting up and maintaining serverless AI services in Snowflake. With default RBAC and Snowflake-native access to all the data and other Cortex services, it is the most intuitive way to bring your data under the AI umbrella. I hope these tips and tricks help you turn your agent from just good to great, and reduce the iterations you'll spend on settings, since I've already gone through them for you.